
I had a request LONG ago for a sticker tutorial and I actually had these screen shots made and saved. I decided to get it up on the blog since my computer is finally back! So here are TWO ways you can make a sticker. This tutorial was done in Photoshop Elements 6.0 but I'm sure you could adapt it to fit your program using similar steps.
OPTION 1
Open a new file
This tutorial is using a 12x12 background (or 3600 pixels x 3600 pixels)
This tutorial is using a 12x12 background (or 3600 pixels x 3600 pixels)

Make two circles in different layers (using the color of your choice) and put them on
top of each other. Make the bottom slightly larger than the top.
Now you should have two layers of circles (or what ever shape you choose)

Using an paper or overlay (Overlay tutorial can be found HERE) place it on top of your
shapes. This will add some texture to the sticker and is optional.

Reduce the paper/overlay to the size of your choice and change the opacity of the
layer so you can see the circles/shapes behind them.
Opacity was set to 40% for this tutorial.

Now duplicate the paper/overlay layer and put one on top of each circle.

Click on the paper/overlay above one of the shapes and hit "Ctrl" and "G" at the
same time to make the top paper layer take on the shape of the shape of circle layer.
Repeat this for the other two layers.

Merge together the crumpled layer and the circle layer by highlighting
the two and right clicking. Repeat with the other layers.

Now merge both of those circle layers together so you have one circle layer.
DO NOT merge the background.

Use your polygonal tool to draw a flat line across the side of the circle and meet the other side.

Right click INSIDE the dotted line and click "Layer via cut".
This will give you two layers in your side bar.
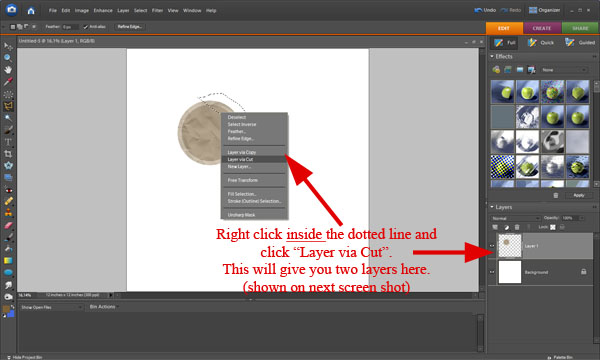
You should have two layers

Select the small layer and use your mouse to rotate it around so it
looks like it is folded on top of the larger circle.
NOTE you may have to adjust it slightly so the flat parts lines on the circle correctly.
looks like it is folded on top of the larger circle.
NOTE you may have to adjust it slightly so the flat parts lines on the circle correctly.

Now you can color the back of the sticker so it is plain (optional, you can leave it the way it is if you like that look). To do this use your eyedropper tool to match the "paint" with the sticker and follow the steps in the screen shot below.

Now your folded side should look like the back of a sticker.

Use your shadow tool to make a shadow under the folded edge.

Now you can add some text OR a graphic.
REMEMBER to put the text/graphic UNDER the folded layer edge to make it look real.
Now you can merge all the layers except the background.
REMEMBER to put the text/graphic UNDER the folded layer edge to make it look real.
Now you can merge all the layers except the background.

Use your crop tool to get close to get close to the edges of the circle.

Delete your background.

Now you should have ONE layer left with no background.
File, Save As, name your file and select PNG file in the drop down box.

VOILA!!
The end result.

OPTION #2
For a basic sticker, put a large white stroke around your graphic/shape
by following the screen shots below.
For a basic sticker, put a large white stroke around your graphic/shape
by following the screen shots below.
#1
 #2
#2
 #3
#3
 #4
#4
 #5
#5
 #6
#6
 #7
#7
Result of using a stoke around your image for a sticker.
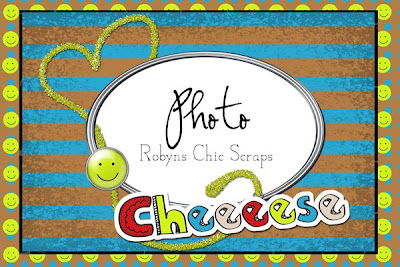
This page was made from my "Capture A Moment" kit.
Hope you enjoyed this tutorial and I'm sure you can adjust it to fit your program and so you can get a sticker perfect for your project.
If you find any problems with this tutorial PLEASE feel free to contact me using the button at the top of my blog.


No comments:
Post a Comment