
Here is a simple tutorial on how to use Photo Masks. This tutorial is done in Photoshop Elements 6.0, but could be adapted to work in your program I'm sure. I'm using a template from some of my Photo Masks below. 

Step 1
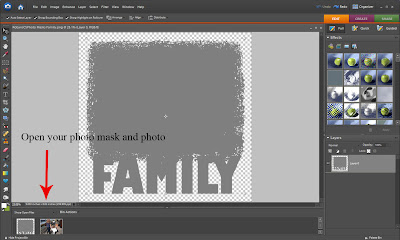
Open your photo mask and photo.
Step 2
Drag your photo down into the tool bar onto your photo mask
Open your photo mask and photo.

Step 2
Drag your photo down into the tool bar onto your photo mask

Step 3
Click on the top photo layer and hit "Ctrl" and "G" at the same time.
This will make your photo take on the shape of the mask.
Click on the top photo layer and hit "Ctrl" and "G" at the same time.
This will make your photo take on the shape of the mask.
 Step 4
Now you can adjust your photo to fit your mask.
Using the corners to make it larger or smaller until your satsified.

Step 5
Once your photo is where you want it to be,
highlight both top and bottom layers and right click on them.
Merge layers so you have one layer.
Once your photo is where you want it to be,
highlight both top and bottom layers and right click on them.
Merge layers so you have one layer.
 Now you can save it as a PNG file for later use, or just drag it to your scrapbook page!
 If you find any problems with this tutorial PLEASE feel free to contact me using the button at the top of my blog.


No comments:
Post a Comment