Here is the JPEG overlay tutorial I was talking about in my last PNG overlay tutorial.
This tutorial is for using an overlay that is a JPEG file. It is done in Photoshop Elements 6.0, but I'm sure can be adjusted to fit your program.
This tutorial is for using an overlay that is a JPEG file. It is done in Photoshop Elements 6.0, but I'm sure can be adjusted to fit your program.
Step 1
Open a new file (Mine is 3600 x 3600 pixels) and open your overlay (which is also 3600x3600)
While looking at your overlay, click it, hold your mouse and drag it over to your background file.
While looking at your overlay, click it, hold your mouse and drag it over to your background file.
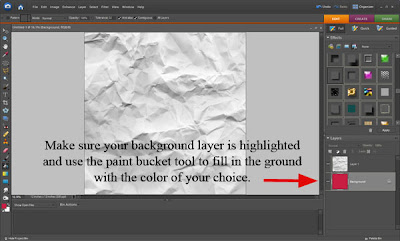
Step 4
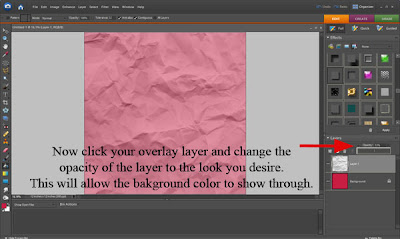
Click on your overlay layer and change the opacity of it so you can see through it to the background. Adjust it until you reach the look you desire.
SIDE NOTE: I did not do this in the tutorial, but you could also play with different eraser tools to erase some of your top JPEG layer to get a different look... or use some paint brushes to add a more grungy look.
You would do that on this step... BEFORE you merge the layers in the next step.
SIDE NOTE: I did not do this in the tutorial, but you could also play with different eraser tools to erase some of your top JPEG layer to get a different look... or use some paint brushes to add a more grungy look.
You would do that on this step... BEFORE you merge the layers in the next step.
Step 5
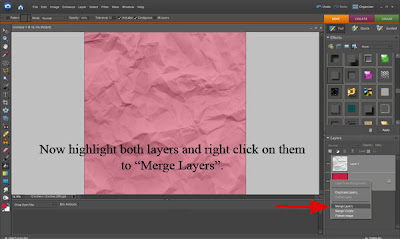
Highlight both layers and right click on them to merge the layers.
Highlight both layers and right click on them to merge the layers.
OPTIONAL
Another thing you can do with your paper is use your burn tool to darken areas.
Click it and move it around your paper in areas you'd like to make darker.
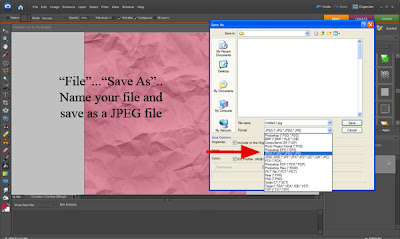
Go to File, Save As, Name your file and click "JPEG".





No comments:
Post a Comment