I've been asked about how to cut out people or objects in a photo. There are many ways to cut out a person or object in Photoshop. I usually use the "Magnetic Lasso" tool but recently discovered the "Magic Extractor" tool and wanted to share how to use it. This tutorial is for Photoshop Elements 6.0, but can be adapted to fit your version of Photoshop or software.
Step 1
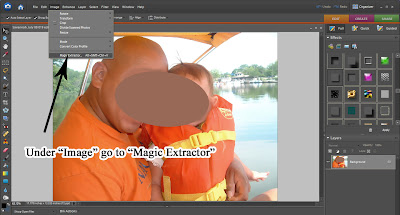
Under "Image", go to "Magic Extractor"
Under "Image", go to "Magic Extractor"

Step 2
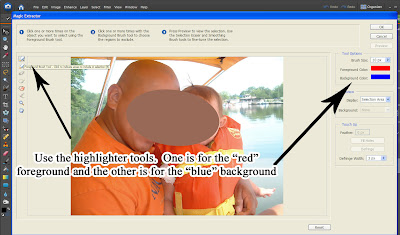
You will see a screen like this.
Your highlighter tools are on the top left.
There is one for the foreground (red) and one for the background (blue).

Step 3
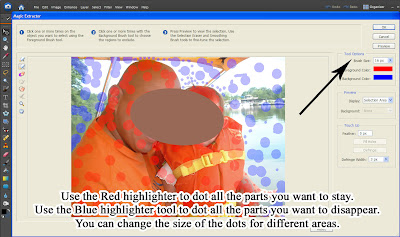
Choose the brush size on the top right that you want your dot size to be.
You can enlarge it for big areas and make it smaller for harder to reach areas.
Start with the red and make dots on everything you want to stay. Place dots in ares of highlights, shadows and color variance to make it work better. Next place the blue dots in the background that you want to disappear.

Step 4
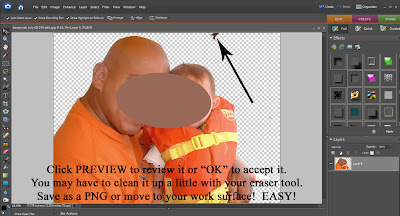
Click "Preview" or "OK" to accept it when your finished placing your dots. You may have to use your eraser tool to clean it up a little. Check your edges around your object also to be sure everything has been erased or see if you need to clean it up. This is why placing the dots strategically in areas of highlights, shadows and color variances is best in step 3.
 Save as a PNG file or drag to your work surface to start using your image! Easy!


1 comment:
Thanks Robyn- I will ahve to try this one out. A new way to delete things, I'm always up for trying new things.
Post a Comment