I had a request for a tutorial on how to use overlays. I hope it benefits some of you. Keep in mind this is done in Photoshop Elements 6.0, but I'm sure it could be adapted to your program. I have two tutorials (I am posting the other one shortly). This one is for using overlays that are saved as PNG files. The other is using overlays that are in JPEG form. Any questions or problems with the tutorial as you go along please don't hesitate to contact me! :)
STEP 1
Open a new file. I am using a 12" x 12" file (3600 pixels x 3600 pixels) for mine.
Open your overlay (My overlay is also 3600 x 3600 and can be found here.)
Have your overlay open and click your mouse on it and drag your overlay down to your background.
Open a new file. I am using a 12" x 12" file (3600 pixels x 3600 pixels) for mine.
Open your overlay (My overlay is also 3600 x 3600 and can be found here.)
Have your overlay open and click your mouse on it and drag your overlay down to your background.
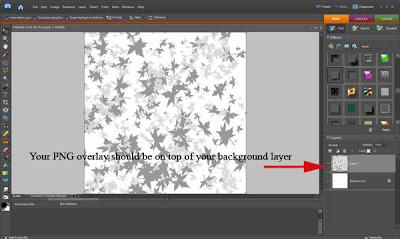 FIG A.
Step 2
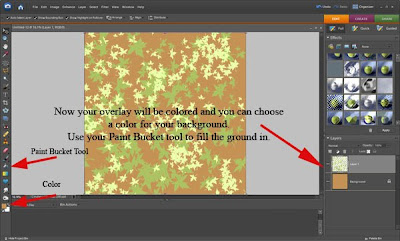
Click on your overlay and go to the Quick menu to change the overlay to a color you like.
(NOTE - You see multiple colors in my overlay below b/c the original PNG file had light and dark gray areas.
If your PNG file is all the same gray color, you will just see one color.)
Step 3
Choose a color for your background and use your Paint Brush Tool to fill it in.
Merge your layers and save as a JPEG (Reference last two screen shots on how to do this).
OR.... (see other option below before saving.)
If your PNG file is all the same gray color, you will just see one color.)
Step 3
Choose a color for your background and use your Paint Brush Tool to fill it in.
Merge your layers and save as a JPEG (Reference last two screen shots on how to do this).
OR.... (see other option below before saving.)
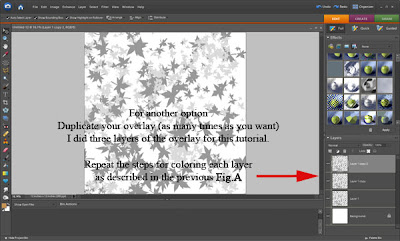
 FOR ANOTHER OPTION.....
In Step 1... instead of working with one layer, you can duplicate the layers to as many as you want. I have 3 layers for this tutorial. (Duplicate layers by right clicking the layer).
Repeat the steps in FIG A above to color each layer.
 Step 4
Once all overlays are colored, choose a brush to use for an eraser.
I chose a spatter brush, but you can use anything you have.
Start with the top overlay layer and erase some of it in various places so you start to see the layer below it show through. Repeat for other layers.
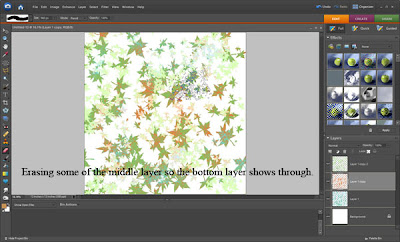 Once you have your layers randomly erased and the color the way you want it, choose a color for your background and use your "Paint Bucket" tool to color it in.
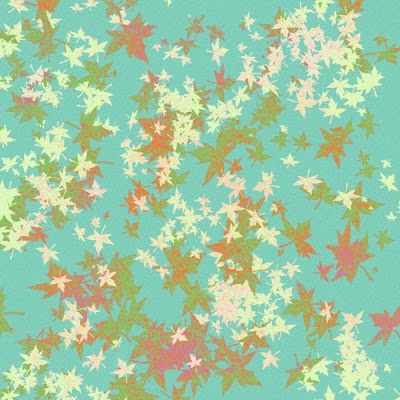
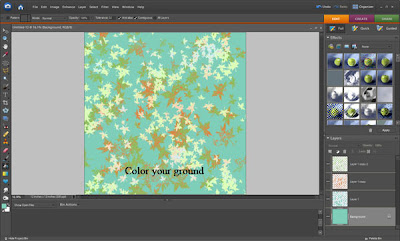 OPTIONAL - Before merging layers, you can play with the filters. I used a texture filter on each layer and on the background.
 If you find any problems with this tutorial PLEASE feel free to contact me using the button at the top of my blog.





1 comment:
Thank you so much for this Freebie. I want to let you know that I posted a link to your blog in CBH Digital Scrapbooking Freebies, under the Page 6 post on Sep. 24, 2009. Thanks again.
Post a Comment