Do you have a digital PNG file that you'd like to use as a digital brush? Do you want to know how to scatter that brush? This tutorial is for Photoshop Elements and will show you how to turn a PNG file into a digital brush and give you an option to scatter the brush around. You probably can be adapted it to work with your program.
Before you start, make sure you have selected the brushes that you want your new brush to be put into. If you want it saved with the "square" brushed, make sure you have selected those brushes before you start with Step 1. I put this one in "Assorted Brushed".
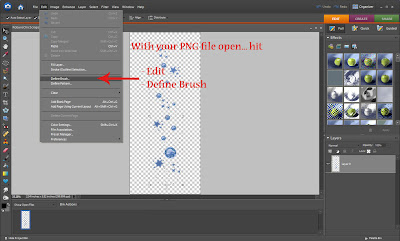
Step 1 - Click "Edit" and "Define Brush"
If your "define brush" feature is not available, your PNG file is most likely to big. Just click on "Image", "Re size", "Image Size" and make the image no bigger than about 2500 pixels and it should work.
If your "define brush" feature is not available, your PNG file is most likely to big. Just click on "Image", "Re size", "Image Size" and make the image no bigger than about 2500 pixels and it should work.
Step 2 - Name your brush
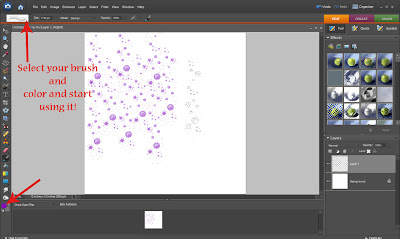
SCATTERING YOUR BRUSH
Another option you can do with your new found brush is to scatter it randomly for a different effect. This is a great tool for making a digital scrapbook paper.
Step 1 - Select your new brush
Click the small black arrow at the top next to the brush icon.
Make sure there is a check mark in the "Scatter" box.
Step 1 - Select your new brush
Click the small black arrow at the top next to the brush icon.
Make sure there is a check mark in the "Scatter" box.
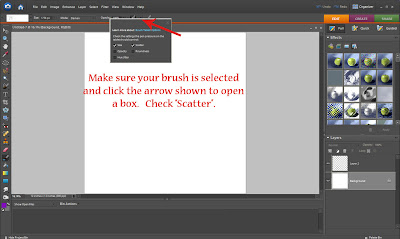
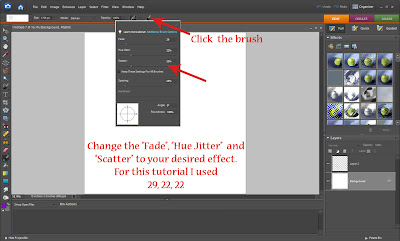
Step 2 - Click the brush at the top.
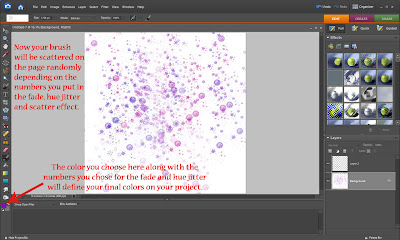
You can play around with the numbers for "Fade", "Hue Jitter" and "Scatter" to get different effects with your brush. For this tutorial I used "Fade 29", "Hue Jitter 22" and "Scatter 22".
Step 3 - Hold your right mouse down and scatter it around.
The color you choose at this point, along with the numbers you use for Fade, Hue Jitter and Scatter, will define the over all color of your finished look. This is where you can play around with the numbers to get a variety of looks.
Simple, easy, FUN! Now go have fun with your new found feature!


No comments:
Post a Comment